Lighting Tests
As we are going to produce a film where CGI (computer generated imagery) blends with live action, we have to learn and figure out methods on how to make CGI and visual effects involved photorealistic. We started off by experimenting with lighting. We set up our own spotlights during a session and got our chosen actor/model to pose as we tried different types of lighting that we felt would be good for the cinematography in our film.
 |
In this image, we used several spotlights and used methods such as gels (translucent sheets of coloured plastic) to change the colour of the light to give different types of emotion and tone to the scene. This will be the image that I will use in Maya later on to simulate a lighting test. |


 |
This is a lighting diagram I had developed in order to keep track of how the lighting was set up in the first photograph. Using a tape measure, paper and pencil, and later Photoshop, I had made an approximate image of the lights, how far they were from the subject (person) and what colour we used for certain lights. |
Lighting Test in Maya
After the lighting test was complete, I decided to replicate the light in Maya 2012. TO do that, I started by creating a polygonal plane in order to import the photograph into the scene. I then assigned a new lambert material to the object and then connected the photograph to the colour section and activated the Hardware Texturing node. The rest of the scene was developed in this order.

Then I created a polygonal sphere to use in the scene. But for this object, I decided to create a glass shader to make it more interesting, and also to experiment on making the object realistic for future reference. T create the glass shader, I assigned a new phong material (you could use either blinn or phong for illumination surfaces but I normally use phong.)


Then to make the shader more effective, I went into Hypershade box (Window - Rendering Editors - Hypershade) and assigned a Remap Value and Sampler Info node. This helps to programme the stimulation of a specific part of the texture, to make it appear more glass like in this case. I connected the Sampler Info node to the Remap Value by middle mouse button dragging it on top of the Remap Value then connecting it as shown in the image. When that was done, I middle dragged the Remap Value to the Transparency and Reflectivity sections of the phong material and then used the Remap Value options to tune the apperance of the texture material to make it look more like glass.

 |
As shown in the image, I used the Utility Sample node in the Remap Value box to enchance the stimulation of the glass shader. |

To further enhance the glass stimulation, I went into the Render Settings box, set the Quality to Production and then altered the Raytracing option. I turned down the Max Trace Depth to 10 to make it even with the Reflections and Refractions options.

This image shows the layout of the spotlights I had placed in the scene, approximately accurate to the lighting diagram shown earlier. I duplicated the spotlights, set them up and then changed the colour, direction and intensity of each one to replicate the lighting in the original photograph, to make it blend in more.
 |
A rendered image of the final version of the scene, showing how the lighting affects the object and is almost accurate to the lighting in the photograph. |
Concept Designs - The Robot
Below is a series of images of my own designs and experimentation for the robot. I attempted to use my own methods of lighting and texture to the components that I had developed in Maya so far.
 |
This image shows a side of the robot head I had produced, based on a few of my own concept sketches. I tried using glass textures and point lights to make the interior of the head more interesting. Also the gear like shapes you see were originally designed to rotate constantly when the robot was animated. |
 |
| This image is of my own original concept sketches for the robot. Originally the robot had two eyes, but it made it look too human so to make it look more threatening, I just gave it one eye. Parts of the robot, specifically the head was influenced by gas masks used during the second World War. |
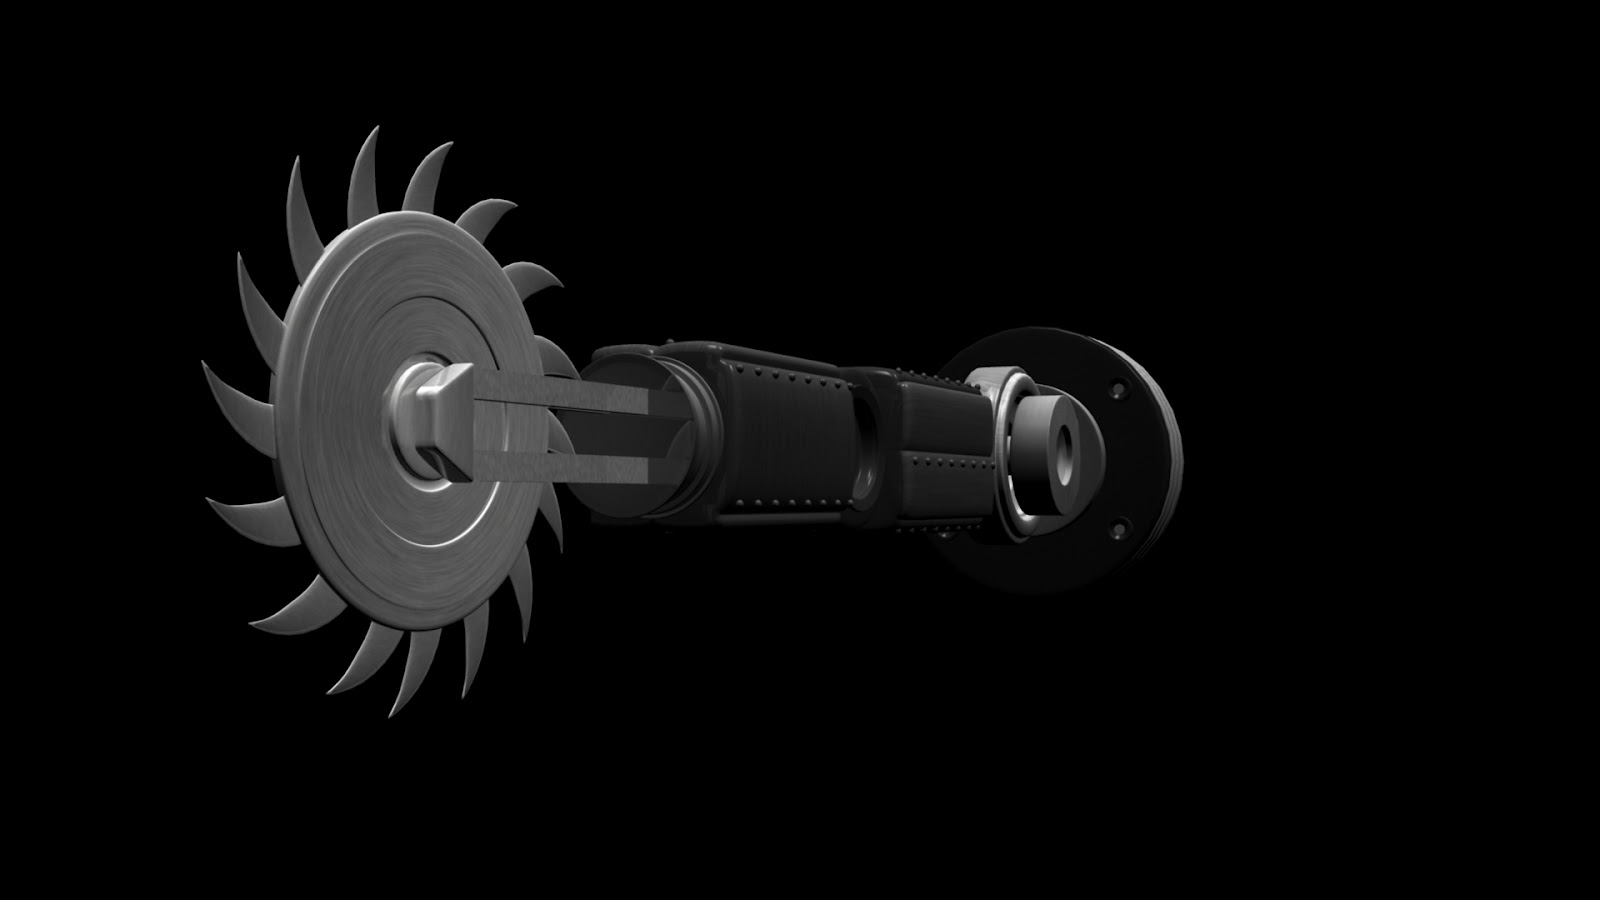
Below are a series of images of one of my own designs/concepts for the robot, an arm with a sawblade in replacment of a hand. The entire arm is of course constructed using basic polygonal shapes such as cubes, spheres and cylinders and each shape is applied a specific material, but most contain the same JPEG image file of a brushed silver metal I had developed in Photoshop long ago. The red wire in the first image, I attempted to add an nCloth node in order to make it move and bend like a wire whenever the arm was animated. Did not have the effect I expected but will find a more sufficient method later on.


The final design for the robot is complete, so on we go to the modelling stage.
No comments:
Post a Comment