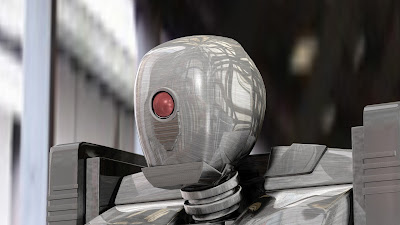
My primary role in this assessment is modelling, so I had to model the final design of the robot from scratch based on the original JPEG images, using them for guidance.
To start the modelling progress, I had to import the robot designs to use as reference. Can't really create a robot without blueprints, so to do that I just produced several polygonal planes, assigned separate textures to them and assigned each JPEG image of the robot designs to those textures and lined them up accurately.
Most of the robot is built from basics shapes, I mainly used polygonal cubes to construct the entire model. To do that, I had to use subdivision surfaces and modify vertices (points where edges intertwine) into the approximate shape of the design. I started off with the head and then added extra features (other parts) to make it look more mechanical. The only spherical polygonal shape I used was for the eye and I duplicated the shape and modified it for an eyelid.
Another cube is used, modelled and duplicated to produce the upper body of the robot. Of course, I had to use the extrude tool to achieve more shape in the structure.
Once I constructed all the components for the upper body and head, I moved on to the arms, legs and lower body. Mainly composed of cubes, for certain parts that could not be built from simple shapes alone, I used the Create Polygon tool, Cut Polygons tool, the Extrude tool and Insert Edge Loop tool. Rather than just having sharp edges for the shapes, I made sure that there were enough subdivision surfaces to have a more of a smooth quality to the structure. I started on making a left arm and leg and then duplicated it and set the scale to negative, (meaning it would face the other way, similar to a mirror effect) thus creating a right arm and leg.
 |
| An image taken from each side of the robot. |
Once every part of the robot model was complete, I made sure to parent certain components to the appropriate parts of the model to approximate human like anatomy. Then I assigned a new material mode to the entire model, a phong (Phong shading) so it would have more of a shiny reflective surface.
A movie clip of a turntable animation of the final model of the robot.
 |
| Texture map that I produced in Photoshop to use for experimentation. |
 |
| Shot of the robot using Image Based Lighting, where you can use an environment map and emit light from that, can be used for photorealistic lighting and texturing. |


No comments:
Post a Comment